 Linux运维笔记|自动化运维攻城狮


系统环境
Centos 6.5 x64
Nginx 1.8.0
MySQL 5.6.24
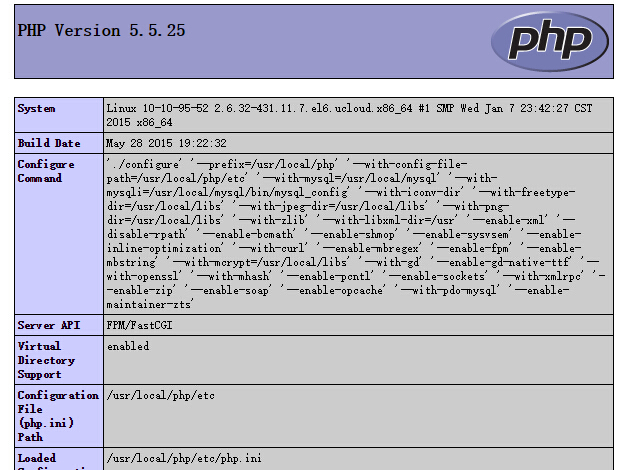
PHP 5.5.25
memcache 1.4.0
redis 3.0.0
一、安装依赖库
- 为了不用在安装过程中一个一个的解决报错,一键安装大部分常用的库
yum install wget pcre openssl* gcc gcc-c++ autoconf libevent libjpeg libjpeg-devel libpng libpng-devel freetype freetype-devel libxml2 libxml2-devel zlib zlib-devel bzip2 bzip2-devel ncurses ncurses-devel curl curl-devel e2fsprogs e2fsprogs-devel krb5 krb5-devel libidn libidn-devel openssl openssl-devel openldap openldap-devel nss_ldap openldap-clients openldap-servers make gd gd2 gd-devel gd2-devel unzip zip -y
二、安装Nginx 1.8.0(目前最新稳定版本)
软件包准备
pcre-8.37.tar.gz
nginx-1.8.0.tar.gz
LuaJIT-2.0.2.tar.gz lua扩展不需要的可以选装
lua-nginx-module.tar.gz安装
/usr/sbin/groupadd www
/usr/sbin/useradd -g www www

tar zxf pcre-8.37.tar.gz
cd pcre-8.37
./configure --prefix=/usr/local/pcre
make && make install

tar zxf LuaJIT-2.0.2.tar.gz
cd LuaJIT-2.0.2
make && make install
ln -s /usr/local/lib/libluajit-5.1.so.2 /lib64/libluajit-5.1.so.2

tar zxf lua-nginx-module.tar.gz
tar zxf nginx-1.8.0.tar.gz
cd nginx-1.8.0
export LUAJIT_LIB=/usr/local/lib
export LUAJIT_INC=/usr/local/include/luajit-2.0
./configure --user=www --group=www --prefix=/usr/local/nginx --with-http_sub_module --with-http_stub_status_module --with-http_ssl_module --with-pcre=../pcre-8.37 --with-http_realip_module --with-http_image_filter_module  --add-module=../lua-nginx-module/
make -j2 && make install
- nginx.conf配置优化(仅供参考)
cd /usr/local/nginx/conf/
vim nginx.conf
user  www www;

#worker_processes 8;
worker_processes 4;

error_log  /data/logs/error.log crit;
#error_log  logs/error.log  notice;
#error_log  logs/error.log  info;
#error_log  /data/logs/nginx_error.log  crit;
#pid        /usr/local/nginx/nginx.pid;
#Specifies the value for maximum file descriptors that can be opened by this process.
worker_rlimit_nofile 50000;
#worker_rlimit_nofile 100000;

events
{
  use epoll;
  worker_connections 65535;
  multi_accept on;
}

http
{
  include       mime.types;
  default_type  application/octet-stream;
  server_tokens off;

  #charset  gb2312;
  #access_log /data/logs/access_log;

  #General Options
  server_names_hash_bucket_size 128;
  client_header_buffer_size 1024k;
  large_client_header_buffers 4 1024k;
  ignore_invalid_headers   on;
  recursive_error_pages    on;
  server_name_in_redirect  off;

  sendfile on;

  #timeouts
  keepalive_timeout 60;
  client_header_timeout 10;
  client_body_timeout 10;
  reset_timedout_connection on;

  #size limits
  client_max_body_size 10m;
  client_body_buffer_size    256k;

  #TCP Options
  tcp_nopush     on;
  tcp_nodelay on;

  #fastcgi options
  fastcgi_connect_timeout 300;
  fastcgi_send_timeout 300;
  fastcgi_read_timeout 300;
  fastcgi_buffer_size 32k;
  fastcgi_buffers 4 64k;
  fastcgi_busy_buffers_size 128k;
  fastcgi_temp_file_write_size 128k;
  fastcgi_intercept_errors on;

  fastcgi_cache_valid 200 302 1h;
  fastcgi_cache_valid 301 1d;
  fastcgi_cache_valid any 1m;
  fastcgi_cache_min_uses 1;

  #gzip  compression
  gzip on;
  gzip_disable "msie6";
  gzip_proxied any;
  gzip_min_length  1k;
  gzip_buffers     4 16k;
  gzip_http_version 1.0;
  gzip_comp_level 4;
  gzip_types       text/plain application/x-javascript application/json text/xml application/xml+res text/javascript text/css application/xml image/jpeg image/gif image/png;
  gzip_vary on;

  log_format main '$remote_addr - $remote_user [$time_local] "$request"' '$status $body_bytes_sent "$http_referer"' '"$http_user_agent" "$http_x_forwarded_for"';

  log_format game_logs  '$query_string';

  #access_log /data/logs/access.log;

  limit_conn_zone  $binary_remote_addr zone=addr:5m;
  limit_conn addr 100;
  limit_rate 500k;

  # cache informations about file descriptors, frequently accessed files
  # can boost performance, but you need to test those values
  open_file_cache max=100000 inactive=20s;
  open_file_cache_valid 30s;
  open_file_cache_min_uses 2;
  open_file_cache_errors on;

  server{
        listen 80 default;
        return 403;

  }
  include    /usr/local/nginx/conf/vhosts/*;
}
- 测试nginx
mkdir -p /usr/local/nginx/conf/vhosts;touch test
vim /usr/local/nginx/conf/vhosts/test
server
{
 listen       80;
 server_name  hostip;                                   #修改为你的服务器地址或者域名
 index index.html index.htm index.php;
 root  /data/www/test;
 location ~ .*\.(php|php5)?$
    {
        #fastcgi_pass  127.0.0.1:9000;
        fastcgi_pass unix:/var/run/php5-fpm.sock;
        fastcgi_index index.php;
        fastcgi_param  SCRIPT_FILENAME \$document_root\$fastcgi_script_name;  #注意使用时去掉'\'
        fastcgi_param  QUERY_STRING     \$query_string;  #注意使用时去掉'\'
        include fastcgi_params;
    }
 location ~ .*\.(gif|jpg|jpeg|png|bmp|swf)$
 {
   expires      30d;
 }
 location ~ .*\.(js|css)?$
 {
  expires      1h;
 }
 error_page  404 = /404.html;
}
mkdir -p /data/www/test
echo "nginx 1.8.0 is work" >> /data/www/test/index.html启动nginx
/usr/local/nginx/sbin/nginx -t#测试配置是否OK
service nginx start
MySQL 5.6.24 目前最新稳定版本
软件下载
mysql-5.6.24.tar.gz依赖包
yum -y install gcc gcc-c++ gcc-g77 autoconf automake zlib* fiex* libxml* ncurses-devel libmcrypt* libtool-ltdl-devel* make cmake`
- 安装
/usr/sbin/groupadd mysql
/usr/sbin/useradd -g mysql mysql -s /sbin/nologin

tar zxf mysql-5.6.24.tar.gz
cd mysql-5.6.24
cmake .
make && make install

mkdir -p /data/mysql/data
chown mysql.mysql /data/mysql/data -R
cd /usr/local/mysql/scripts
./mysql_install_db --user=mysql --basedir=/usr/local/mysql --datadir=/data/mysql/data
\cp -f /usr/local/mysql/support-files/mysql.server /etc/init.d/mysqld
chmod +x /etc/init.d/mysqld
chkconfig --add mysqld
chkconfig mysqld on
- 配置内存4G 优化=》可以参考
vim /etc/my.cnf
[client]
#password   = your_password
port        = 3306
socket      = /tmp/mysql.sock

[mysqld]
port        = 3306
socket      = /tmp/mysql.sock
datadir =  /data/mysql/data/
skip-external-locking
key_buffer_size = 64M
max_allowed_packet = 1M
table_open_cache = 256
sort_buffer_size = 1M
net_buffer_length = 8K
read_buffer_size = 1M
read_rnd_buffer_size = 512K
myisam_sort_buffer_size = 16M
thread_cache_size = 32
query_cache_size = 32M
tmp_table_size = 64M

explicit_defaults_for_timestamp = true
#skip-networking
max_connections = 500
max_connect_errors = 100
open_files_limit = 65535

log-bin=mysql-bin
binlog_format=mixed
server-id   = 1
expire_logs_days = 10

#loose-innodb-trx=0
#loose-innodb-locks=0
#loose-innodb-lock-waits=0
#loose-innodb-cmp=0
#loose-innodb-cmp-per-index=0
#loose-innodb-cmp-per-index-reset=0
#loose-innodb-cmp-reset=0
#loose-innodb-cmpmem=0
#loose-innodb-cmpmem-reset=0
#loose-innodb-buffer-page=0
#loose-innodb-buffer-page-lru=0
#loose-innodb-buffer-pool-stats=0
#loose-innodb-metrics=0
#loose-innodb-ft-default-stopword=0
#loose-innodb-ft-inserted=0
#loose-innodb-ft-deleted=0
#loose-innodb-ft-being-deleted=0
#loose-innodb-ft-config=0
#loose-innodb-ft-index-cache=0
#loose-innodb-ft-index-table=0
#loose-innodb-sys-tables=0
#loose-innodb-sys-tablestats=0
#loose-innodb-sys-indexes=0
#loose-innodb-sys-columns=0
#loose-innodb-sys-fields=0
#loose-innodb-sys-foreign=0
#loose-innodb-sys-foreign-cols=0

default_storage_engine = InnoDB
#innodb_data_home_dir =
#innodb_data_file_path = ibdata1:10M:autoextend
#innodb_log_group_home_dir =
#innodb_buffer_pool_size = 16M
#innodb_log_file_size = 5M
#innodb_log_buffer_size = 8M
#innodb_flush_log_at_trx_commit = 1
#innodb_lock_wait_timeout = 50

[mysqldump]
quick
max_allowed_packet = 16M

[mysql]
no-auto-rehash

[myisamchk]
key_buffer_size = 64M
sort_buffer_size = 1M
read_buffer = 2M
write_buffer = 2M

[mysqlhotcopy]
interactive-timeout

[mysqld_safe]
log-error=/data/mysql/mysql.log.err
pid-file=/data/mysql/mysqld.pid

sql_mode=NO_AUTO_CREATE_USER,NO_ENGINE_SUBSTITUTION
- 启动MySQL服务
service mysqld start
/usr/local/mysql/bin/mysqladmin -uroot password 123456
echo "export PATH=$PATH:/usr/local/mysql/bin" >> /etc/profile
source /etc/profile
# 查看端口是否启动
netstat -tpln|grep 3306
PHP 5.5.25 稳定版本
- 软件包准备 建议google下载较新的版本
php-5.5.25.tar.gz            jpegsrc.v9.tar.gz        libiconv-1.14.tar.gz       libmcrypt-2.5.8.tar.gz
libpng-1.6.17.tar.gz         gd-2.0.35.tar.bz2        mcrypt-2.6.8.tar.gz        mhash-0.9.9.9.tar.gz
freetype-2.5.5.tar.gz        autoconf-latest.tar.gz
- 安装
tar zxf jpegsrc.v9.tar.gz
cd jpeg-9
./configure --prefix=/usr/local/libs --enable-shared --enable-static --prefix=/usr/local/libs
make && make install

tar zxf libpng-1.6.17.tar.gz
cd libpng-1.6.17
./configure --prefix=/usr/local/libs
make && make install

tar zxf freetype-2.5.5.tar.gz
cd freetype-2.5.5
./configure --prefix=/usr/local/libs
make && make install

tar zxf libmcrypt-2.5.8.tar.gz
cd libmcrypt-2.5.8
./configure --prefix=/usr/local/libs
make && make install
cd libltdl/
./configure --prefix=/usr/local/libs --enable-ltdl-install
make && make install

tar zxf mhash-0.9.9.9.tar.gz
cd mhash-0.9.9.9
./configure --prefix=/usr/local/libs
make && make install

cat >> /etc/ld.so.conf.d/local.conf << EOF
/usr/local/libs/lib
EOF
ldconfig -v

ln -s /usr/local/libs/lib/libmcrypt.la /usr/lib64/libmcrypt.la
ln -s /usr/local/libs/lib/libmcrypt.so  /usr/lib64/libmcrypt.so
ln -s /usr/local/libs/lib/libmcrypt.so.4 /usr/lib64/libmcrypt.so.4
ln -s /usr/local/libs/lib/libmcrypt.so.4.4.8 /usr/lib64/libmcrypt.so.4.4.8
ln -s /usr/local/libs/lib/libmhash.a /usr/lib64/libmhash.a
ln -s /usr/local/libs/lib/libmhash.la /usr/lib64/libmhash.la
ln -s /usr/local/libs/lib/libmhash.so /usr/lib64/libmhash.so
ln -s /usr/local/libs/lib/libmhash.so.2 /usr/lib64/libmhash.so.2
ln -s /usr/local/libs/lib/libmhash.so.2.0.1 /usr/lib64/libmhash.so.2.0.1

tar zxf mcrypt-2.6.8.tar.gz
cd mcrypt-2.6.8
export LDFLAGS="-L/usr/local/libs/lib -L/usr/lib"
export CFLAGS="-I/usr/local/libs/include -I/usr/include"
touch malloc.h
./configure --prefix=/usr/local/libs --with-libmcrypt-prefix=/usr/local/libs
make && make install

tar zxf libiconv-1.14.tar.gz
cd libiconv-1.14
./configure --prefix=/usr/local/libs
make && make install

tar jxf gd-2.0.35.tar.bz2
cd gd-2.0.35
./configure --prefix=/usr/local/libs
make && make install

tar zxf php-5.5.25.tar.gz
cd php-5.5.25
export LIBS="-lm -ltermcap -lresolv"
export DYLD_LIBRARY_PATH="/usr/local/mysql/lib/:/lib/:/usr/lib/:/usr/local/lib:/lib64/:/usr/lib64/:/usr/local/lib64/lib"
export LD_LIBRARY_PATH="/usr/local/mysql/lib/:/lib/:/usr/lib/:/usr/local/lib:/lib64/:/usr/lib64/:/usr/local/lib64/lib"
./configure --prefix=/usr/local/php --with-config-file-path=/usr/local/php/etc --with-mysql=/usr/local/mysql --with-mysqli=/usr/local/mysql/bin/mysql_config --with-iconv-dir --with-freetype-dir=/usr/local/libs --with-jpeg-dir=/usr/local/libs --with-png-dir=/usr/local/libs --with-zlib --with-libxml-dir=/usr --enable-xml --disable-rpath --enable-bcmath --enable-shmop --enable-sysvsem --enable-inline-optimization --with-curl --enable-mbregex --enable-fpm --enable-mbstring --with-mcrypt=/usr/local/libs --with-gd --enable-gd-native-ttf --with-openssl --with-mhash --enable-pcntl --enable-sockets --with-xmlrpc --enable-zip --enable-soap --enable-opcache --with-pdo-mysql --enable-maintainer-zts
make ZEND_EXTRA_LIBS='-liconv'
make install
cp php.ini-development /usr/local/php/etc/php.ini
cp sapi/fpm/init.d.php-fpm /etc/rc.d/init.d/php-fpm

tar zxf autoconf-latest.tar.gz
cd autoconf-2.69/
./configure --prefix=/usr/local/libs
make && make install
- memcache 扩展
tar zxf memcache-2.2.7.tgz
cd memcache-2.2.7/
export PHP_AUTOCONF="/usr/local/libs/bin/autoconf"
export PHP_AUTOHEADER="/usr/local/libs/bin/autoheader"
/usr/local/php/bin/phpize
./configure --with-php-config=/usr/local/php/bin/php-config
make && make install
echo 'extension = "memcache.so"' >> /usr/local/php/etc/php.ini
- php-fpm 配置
mkdir -p /usr/local/php/var/run/
mkdir -p /var/log/php/
vim /usr/local/php/etc/php-fpm.conf
[global]
pid = /var/run/php-fpm.pid
error_log = /var/log/php/php-fpm.log
log_level = notice
[www]
listen = /var/run/php5-fpm.sock
;listen = 127.0.0.1:9000
user = www
group = www
listen.owner = www
listen.group = www
listen.mode = 0666
pm = dynamic
pm.max_children = 128
pm.start_servers = 8
pm.min_spare_servers = 4
pm.max_spare_servers = 35
pm.max_requests = 10240
EOF

chmod 755 /etc/rc.d/init.d/php-fpm
chkconfig --add php-fpm
chkconfig --level 35 php-fpm on
touch /var/run/php5-fpm.sock
chmod +x /var/run/php5-fpm.sock
chown www.www /var/run/php5-fpm.sock
service php-fpm start
- 测试
vim /data/www/test/info.php
<?php
phpinfo();
访问地址:http://ip/info.php 出现info页面即安装成功
安装 memcached
- 软件包
memcached-1.4.0.tar.gz libevent-2.0.22-stable.tar.gz - 安装
tar zxf libevent-2.0.22-stable.tar.gz
./configure  --prefix=/usr/local/libs
make && make install
ldconfig -v > /dev/null
cd ../
tar zxf memcached-1.4.0.tar.gz
cd memcached-1.4.0
./configure --prefix=/usr/local/memcached --with-libevent=/usr/local/libs/
make && make install
- 启动
/usr/local/memcached/bin/memcached -d -u root -p 11211 -m 1024 -c 51200 -P /var/run/memcached.pid
 echo "/usr/local/memcached/bin/memcached -d -u root -p 11211 -m 1024 -c 51200 -P /var/run/memcached.pid" >> /etc/rc.local

-d  选项是启动一个守护进程,
-m  是分配给Memcache使用的内存数量,单位是MB
-u  是运行Memcache的用户
-p  是设置Memcache监听的端口,
-c  选项是最大运行的并发连接数,默认是1024
-P  是设置保存Memcache的pid文件
- 脚本
vim /etc/init.d/memcached
#!/bin/bash
# chkconfig: - 55 45
# description:  The memcached daemon is a network memory cache service.
# processname: memcached
# config: /etc/sysconfig/memcached
# pidfile: /var/run/memcached/memcached.*.pid

# Standard LSB functions
#. /lib/lsb/init-functions

# Source function library.
. /etc/init.d/functions

PORT=11211
USER=www
MAXCONN=1024
OPTIONS=""

if [ -f /etc/sysconfig/memcached ];then
    . /etc/sysconfig/memcached
fi

# Check that networking is up.
. /etc/sysconfig/network

if [ "$NETWORKING" = "no" ]
then
    exit 0
fi

RETVAL=0
prog="memcached"
DAEMON=/usr/local/memcached/bin/memcached

start_instance() {
    echo -n $"Starting $prog ($1): "
    daemon --pidfile /var/run/memcached/memcached.$1.pid $DAEMON -d -p $PORT -u $USER  -m $2 -c $MAXCONN -P /var/run/memcached/memcached.$1.pid $OPTIONS
    RETVAL=$?
    echo
    [ $RETVAL -eq 0 ] && touch /var/lock/subsys/memcached.$1
    PORT=`expr $PORT + 1`
}

stop_instance() {
    echo -n $"Stopping $prog ($1): "
    killproc -p /var/run/memcached/memcached.$1.pid memcached
        RETVAL=$?
        echo
    if [ $RETVAL -eq 0 ] ; then
            rm -f /var/lock/subsys/memcached.$1
            rm -f /var/run/memcached.$1.pid
        fi
}

start () {
    # insure that /var/run/memcached has proper permissions
    if [ "`stat -c %U /var/run/memcached`" != "$USER" ]; then
        chown $USER /var/run/memcached
    fi

    start_instance default 64;
}
stop () {
    stop_instance default;
}

restart () {
    stop
    start
}


# See how we were called.
case "$1" in
  start)
    start
    ;;
  stop)
    stop
    ;;
  status)
    status memcached
    ;;
  restart|reload|force-reload)
    restart
    ;;
  condrestart)
    [ -f /var/lock/subsys/memcached ] && restart || :
    ;;
  *)
    echo $"Usage: $0 {start|stop|status|restart|reload|force-reload}"
    exit 1
esac

exit $?
- 脚本操作说明
mkdir -p /var/run/memcached
chown www:www -R /var/run/memcached
chmod +x /etc/init.d/memcached
chkconfig --add memcached
service memcached start
安装 redis 和 redis php扩展
- 软件包
redis-3.0.0.tar.gz phpredis-2.2.4.tar.gz - 安装
tar zxf redis-3.0.0.tar.gz
cd redis-3.0.0
make;cd src
mkdir -p /usr/local/redis/bin/
cp -f redis-benchmark redis-check-aof   redis-check-dump redis-cli  \
redis-sentinel redis-server redis-trib.rb /usr/local/redis/bin/
cp redis.conf /usr/local/redis/bin/

redis-server          Redis服务器的daemon启动程序
redis-cli             Redis命令行操作工具。也可以用telnet根据其纯文本协议来操作
redis-benchmark       Redis性能测试工具,测试Redis在当前系统下的读写性能
redis-check-aof       数据修复
redis-check-dump      检查导出工具
- 修改 redis.conf 配置文件参考
daemonize yes                                      #是否以后台daemon方式运行
pidfile /var/run/redis.pid                         #pid文件位置
port 60001
dbfilename dump.rdb                                #数据快照文件名(只是文件名,不包括目录)
dir /data/redis_dump                               #数据快照的保存目录(这个是目录)
timeout 0                                          #请求超时时间
loglevel notice
logfile stdout
databases 16
save 900 1
save 300 10
save 60 10000
stop-writes-on-bgsave-error yes
rdbcompression yes
rdbchecksum yes
slave-serve-stale-data yes
slave-read-only yes
slave-priority 100
appendonly no                                     #是否开启appendonlylog,开启的话每次写操作会记一条log,这会提高数据抗风险能力,但影响效率。
appendfsync everysec                              #如何同步到磁盘(三个选项,分别是每次写都强制调用fsync、每秒启用一次fsync、不调用fsync等待系统自己同步)
no-appendfsync-on-rewrite no
auto-aof-rewrite-percentage 100
auto-aof-rewrite-min-size 64mb
lua-time-limit 5000
slowlog-log-slower-than 10000
slowlog-max-len 128
hash-max-ziplist-entries 512
hash-max-ziplist-value 64
list-max-ziplist-entries 512
list-max-ziplist-value 64
set-max-intset-entries 512
zset-max-ziplist-entries 128
zset-max-ziplist-value 64
activerehashing yes
client-output-buffer-limit normal 0 0 0
client-output-buffer-limit slave 256mb 64mb 60
client-output-buffer-limit pubsub 32mb 8mb 60
- 启动脚本
vim /etc/init.d/redis
#!/bin/sh
#chkconfig: 345 86 14
#description: Startup and shutdown script for Redis

PROGDIR=/usr/local/redis/bin
PROGNAME=redis-server
DAEMON=$PROGDIR/$PROGNAME
CONFIG=/usr/local/redis/bin/redis.conf
PIDFILE=/var/run/redis.pid
DESC="redis daemon"
SCRIPTNAME=/etc/rc.d/init.d/redis
DUMPDIR=/data/redis_dump

start()
{
         if [ ! -d $DUMPDIR ];then
                mkdir -p $DUMPDIR
         fi
         if test -x $DAEMON
         then
        echo -e "Starting $DESC: $PROGNAME"
                   if $DAEMON $CONFIG
                   then
                            echo -e "OK"
                   else
                            echo -e "failed"
                   fi
         else
                   echo -e "Couldn't find Redis Server ($DAEMON)"
         fi
}

stop()
{
         if test -e $PIDFILE
         then
                   echo -e "Stopping $DESC: $PROGNAME"
                   if kill `cat $PIDFILE`
                   then
                            echo -e "OK"
                   else
                            echo -e "failed"
                   fi
         else
                   echo -e "No Redis Server ($DAEMON) running"
         fi
}
restart()
{
    echo -e "Restarting $DESC: $PROGNAME"
    stop
         start
}
list()
{
         ps aux | grep $PROGNAME
}
case $1 in
         start)
                   start
        ;;
         stop)
        stop
        ;;
         restart)
        restart
        ;;
         list)
        list
        ;;

         *)
        echo "Usage: $SCRIPTNAME {start|stop|restart|list}" >&2
        exit 1
        ;;
esac
exit 0
* 启动
chmod +x /etc/init.d/redis
chkconfig --add redis
chkconfig redis on
service redis start
到此为止就顺利安装完成啦,源码安装,方便升级,方便扩展!!!